
Floating shelves look effortless once they are up. Getting them there is a different story. Most DIY shelf installations that end in disaster — shelves pulling out of the wall, sagging under load, or hanging at an obvious angle — do not fail because of bad products. They fail because of two or three small decisions made early in the process that nobody warned the homeowner about.
This guide covers how to install floating shelves correctly from the beginning, including how to find studs reliably, what to do when studs are not where you need them, how to get a shelf perfectly level without a helper, and the specific mistakes that cause shelves to fall months after installation. If you follow the steps here, your shelves will hold real weight and stay put for years.
The Most Important Thing to Understand Before You Start
Floating shelves are cantilevered — they extend out from the wall with no support underneath. Every pound you put on the shelf creates rotational force that pulls the top of the bracket away from the wall and pushes the bottom of the bracket into it. The deeper the shelf and the farther the weight sits from the wall, the more force that bracket connection needs to resist.
This is why the mounting method matters so much more for floating shelves than for regular shelved units with legs or floor support. Floating shelves need to be anchored into solid wall structure. Drywall alone will not work for anything beyond the lightest display shelf. A properly installed floating shelf into two wall studs can hold 90 to 100 pounds — plenty for books, dishes, or plants. The same shelf mounted only with standard drywall anchors will eventually pull out, and it may do it gradually over months rather than immediately, which makes it more dangerous because nothing warns you it is failing.
Everything in this guide comes back to that one principle: find the studs, mount into them, and understand your options clearly if studs are not available where you need them.
Tools and Materials
You will not need much, but a few of these are non-negotiable. Do not skip the stud finder and do not skip the level.
Required: Stud finder, drill with bits, level (24-inch is ideal), measuring tape, pencil, screwdriver, and appropriate screws for your mounting system. If you are using a keyhole or French cleat mounting system, you will also need a router or a table saw, or you can buy pre-routed cleats.
Helpful but optional: Painter’s tape for marking stud locations, a laser level if you are hanging multiple shelves, a stud finder app as a backup, safety glasses, and a vacuum for drilling debris.
For the shelf itself, if you are buying a pre-made floating shelf, make sure it comes with its own mounting hardware and that the hardware is designed for wall stud installation rather than relying only on drywall anchors. If you are building your own shelf from wood, you have more flexibility in how you engineer the mounting.
Step 1. Plan the Placement Before You Touch a Drill
Five minutes of planning saves you from filling unnecessary holes. Before you pick up a tool, decide the exact height, length, and position of the shelf on the wall, and think through what you will actually put on it.
Height is mostly personal preference, but a few rules of thumb help. For shelves in a kitchen, 18 inches above the counter gives enough clearance to use the counter comfortably. For a living room display shelf, eye level when standing (roughly 60 to 65 inches from the floor) makes items visible without straining. For shelves above a desk, leave at least 12 to 15 inches above the desk surface so you can actually reach what is on the shelf without knocking your head.
If you are planning multiple shelves stacked vertically, decide the spacing before mounting any of them. A common mistake is mounting the first shelf at the right height and then running out of room for the second one because the spacing was not worked out in advance.
Also think about what the shelf will hold and how much it will weigh. A shelf holding framed photos and a small plant has completely different structural requirements than one holding a row of hardcover books or a collection of cast iron cookware. This determines which mounting method you use and how critical it is to hit studs rather than using anchors.
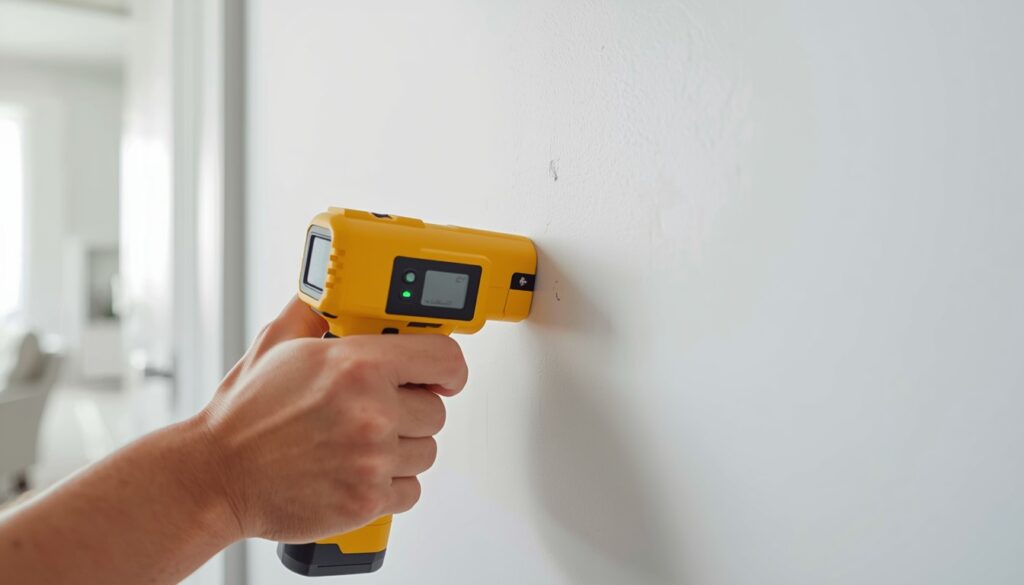
Step 2. Find the Studs Reliably
This is the step most people do too quickly and then regret. Stud finders work well when used correctly, but there are a few things worth knowing before you trust the marks you make.
In most American homes built after the 1950s, studs are spaced 16 inches apart on center. This means from the center of one stud to the center of the next is consistently 16 inches, with some areas of the house using 24-inch spacing instead. Start by running your stud finder slowly across the wall from one side. Most electronic stud finders beep or light up when they detect a change in wall density indicating the edge of a stud. Mark both edges of each stud, then mark the center between them — that center point is where you will drive your screw for maximum grip.
Do not fully trust a single stud finder pass. Stud finders can give false readings near pipes, electrical wires, and plaster irregularities. Confirm what you find with a second method. The simplest backup is to drive a thin finish nail at an angle into a spot you believe is the center of a stud. If it hits solid wood after about half an inch, you have found the stud. If it pushes through into open space, it missed. The nail hole is small enough to fill with a tiny dab of spackle later.
Another reliable method for finding the first stud is to remove the cover plate from a nearby outlet or light switch. Outlets are almost always nailed to the side of a stud, so you can see directly which side of the box the stud is on, then measure out in 16-inch increments from there to find the rest.
Mark your confirmed stud locations with small pieces of painter’s tape rather than pencil marks. Tape is easier to reposition if your measurements shift slightly, and it is more visible when you are holding the shelf level with one hand and trying to find your marks.
Step 3. What to Do When Studs Are Not Where You Need Them
This is the situation that causes the most frustration and the most compromised shelf installations. You have decided where the shelf should go, and the studs land two or three inches to the left of where you need them. You have a few real options, and the choice depends on how much weight the shelf will hold.
Option A. Shift the Shelf Position
If the shelf position is somewhat flexible, adjust it left or right until the mounting points align with studs. This is always the best option when it is available. A shelf that is three inches to the right of your first choice is better than a shelf hanging from drywall anchors in your exact preferred spot.
Option B. Use Toggle Bolts for Heavier Loads on Drywall
When stud alignment is simply not possible and the shelf needs to hold meaningful weight, toggle bolts are significantly stronger than standard drywall anchors. Toggle bolts can support up to 238 pounds in half-inch drywall when installed correctly. The toggle wing spreads the load over a larger area of the drywall back panel rather than concentrating it at a single point the way a simple anchor does. They require a larger hole to install and they are not removable once set, but for a shelf that will hold books or kitchen items with no stud available, they are the right tool.
Even with toggle bolts, use them as supplemental support only and always install into at least one wall stud where possible. A shelf with one connection into a stud and one into a properly installed toggle bolt will outperform a shelf using toggle bolts only.
Option C. Add Blocking Inside the Wall
If you are doing a full room renovation and know in advance where shelves will go, blocking is the strongest solution. Blocking means cutting an opening in the drywall, screwing a horizontal piece of 2×4 or 2×6 lumber between the studs at the exact height you need, and patching the drywall. You now have a continuous solid mounting surface at that height that will hold far more weight than any anchor system. It is more work upfront, but it gives you complete flexibility in horizontal shelf placement with maximum holding strength.
Step 4. Mark Your Layout Lines
With your stud locations confirmed and your shelf position decided, mark the wall clearly before drilling anything. This is where a level becomes essential.
Hold your level against the wall at the height you want the shelf and draw a light pencil line across the full width of where the shelf will go. This is your reference line for everything. All bracket or mounting hardware installations need to be on or aligned to this line, or the shelf will hang crooked.
Measure along the line to mark the exact positions of each bracket or mounting rod. For a shelf with two brackets, position them roughly one quarter of the shelf length in from each end rather than at the very ends. This distributes weight more effectively and reduces the risk of the shelf flexing in the middle under load. For a 36-inch shelf, brackets positioned at roughly 9 inches from each end outperform brackets at the outer edges.
If you are installing multiple shelves in a column, use a level or tape measure to mark all the heights before drilling any of them. Getting all the layout done before any drilling means you catch spacing problems before you have committed any holes to the wall.
Step 5. Mount the Brackets or Hardware to the Wall
Floating shelves use a few different mounting systems. Which steps you follow depends on which type you have.
Bracket-Style Shelves
These are the most common type for store-bought floating shelves. The bracket is a flat metal plate or L-shape that mounts to the wall and the shelf slides or snaps over it. Hold the bracket at your marked position on the level line, use a pencil to mark the screw hole locations, set the bracket aside, and drill pilot holes at each mark. Pilot holes prevent the wood stud from splitting when you drive the screw and give you more control over screw placement.
Drive the mounting screws through the bracket and into the stud. Use at least a quarter-inch drill bit to start and confirm you are hitting solid wood, not hollow space. The screw should feel firm resistance all the way in, not loose or spongy. A loose screw that just turns without biting is not in a stud — stop, fill that hole with a toothpick dipped in wood glue to give the screw something to grip, let it dry, and try again in a slightly different position.
After mounting, check the bracket level again before installing the shelf. Brackets can shift slightly as screws are tightened. A small adjustment now takes five seconds. Adjusting after the shelf is on takes everything apart.
Rod or Pin-Style Hidden Bracket Shelves
These shelves have a back plate or individual rods that mount to the wall, and the shelf slides over the rods with no visible hardware from the front. They look the cleanest but have zero tolerance for misalignment — if the rods are not exactly level with each other and exactly the right distance apart, the shelf either will not slide on or will fit crookedly.
Mount the back plate or each rod carefully to your level line. Most systems come with a template or mounting guide that helps keep everything in the right position while you mark and drill. If yours does not, make your own by drawing the rod positions on a piece of cardboard cut to the same dimensions as the shelf back, then use it as a drilling guide held against the wall.
French Cleat System
A French cleat uses two pieces of wood or metal cut at a 45-degree bevel — one mounted to the wall and one attached to the back of the shelf — that interlock. This system is extremely strong when the wall-mounted cleat is screwed into studs along its full length, and it allows you to reposition or remove shelves easily without tools. It is particularly good for heavy shelves or situations where you want flexibility to rearrange things in the future. The Wikipedia article on French cleats covers the mechanics of the joint if you want to understand how the load distribution works before building one.
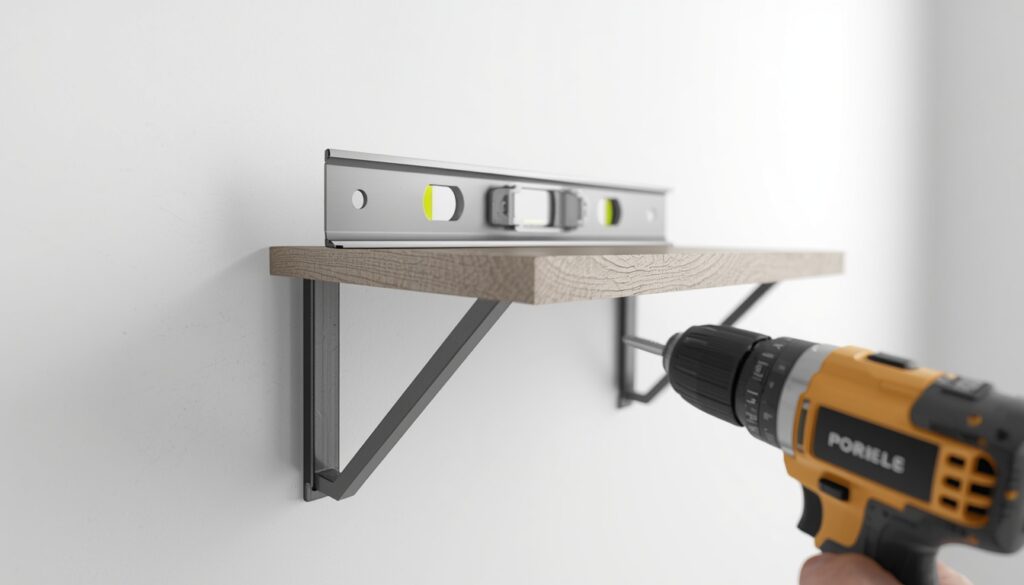
Step 6. Get the Shelf Perfectly Level
A shelf that is even slightly off level is something your eye will pick up every time you look at it, even if you cannot immediately articulate why something feels wrong. Getting it right takes an extra two minutes and is completely worth the effort.
After the shelf is on, set your level on top of it and look at the bubble. If it is off, do not immediately start adjusting screws. First figure out which end is lower, then determine whether the issue is in the bracket mounting or in the shelf itself being slightly warped. A bubble shifted slightly toward one end means that end is lower. Small adjustments of a fraction of an inch in the bracket mounting can bring it into level, but make sure you are adjusting the right thing.
For bracket-style shelves, slightly loosening the lower-end bracket screws and placing a thin shim (even a folded piece of cardstock) behind the bracket at the top edge can bring it up enough to level. For hidden rod systems, the level needs to come from the initial installation because there is very little adjustment possible once the shelf is on.
If you are hanging multiple shelves and want them all at consistent spacing, measure from the shelf surface down to the floor rather than from the ceiling down. Floors are more consistently level than ceilings in most homes, so floor-referenced measurements give you more consistent visual alignment across a long wall.
Step 7. Test the Load Before Putting Anything Valuable on the Shelf
Before you arrange anything on the newly installed shelf, test it. Push down firmly on the front edge of the shelf with both hands. The shelf should feel completely solid with zero movement. Then push horizontally along the shelf length. Again, no movement. If you feel any flex, wobble, or hear any creak from the wall, the installation is not done. A shelf that moves even slightly under manual pressure will fail under repeated loading and unloading over time.
If there is movement, the most likely cause is one of three things. A screw that did not fully seat into a stud and is relying on drywall for grip. A bracket that is slightly warped and not making full contact with the wall. Or a rod that is not fully inserted into the shelf body. Check each of these before loading the shelf.
If you plan to display a collection of heavy items, always aim for a combined load that leaves a 20 percent safety margin below the anchor’s rated limit. This prevents long-term wall fatigue and keeps the shelf level for years. If the shelf is rated for 50 pounds and you want to put books on it, weigh the books first if you are anywhere close to that limit. It is easy to underestimate how much a full row of hardcovers weighs.
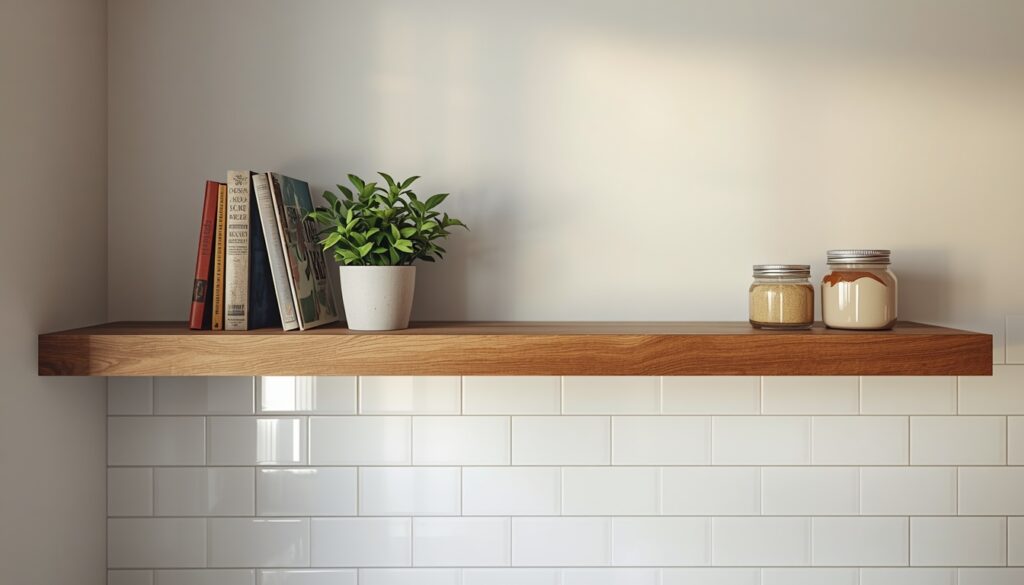
Common Mistakes That Cause Floating Shelves to Fall
Trusting only the stud finder without confirming the reading. Stud finders are useful starting points, not infallible guides. Always confirm with a finish nail or a second method before committing to a hole position.
Using standard hollow wall anchors for a heavily loaded shelf. The small plastic anchors that come in most hardware kits are fine for hanging a picture frame. They are not adequate for a shelf that will hold books or kitchenware. Regular hollow wall anchors are fine for plaster with very light loads. For any meaningful weight in drywall, you need butterfly or toggle anchors, or better yet, stud mounting.
Not checking level until the shelf is fully installed. By that point, correcting the issue means removing everything and starting over. Check level at every stage — after marking, after mounting brackets, and after placing the shelf.
Overtightening screws into drywall. Overtightening compresses and crushes the drywall around the screw, which reduces grip rather than increasing it. Tighten until snug and then stop. The holding strength comes from depth into the stud, not from crushing the surrounding material.
Installing a shelf horizontally centered on the wall without accounting for where the studs actually are. If the centered position puts both brackets between studs, you either need to shift the shelf position, use a French cleat that spans multiple studs, or add blocking. Planning for stud locations before deciding on exact shelf position avoids this entirely.
Loading the shelf before the installation has been properly tested. Put weight on a shelf with a compromised connection and the failure happens immediately rather than gradually, which means breakage and damage that could have been avoided.
Floating Shelf Ideas and Placement Tips
Once you are confident in the installation process, the creative side is the fun part. Floating shelves work in almost every room of the house and serve different purposes in each one.
In the kitchen, a single floating shelf above the counter or beside the stove is one of the most popular uses. It keeps frequently used items within reach without taking up counter space. If you are already updating the kitchen visually, pairing a new shelf with something like a peel-and-stick backsplash behind it makes both projects feel like a coordinated upgrade rather than two separate tasks.
In a living room or bedroom, a horizontal run of shelves above a sofa or behind a desk creates a focal point and provides storage without the visual weight of a floor-to-ceiling unit. Keep the shelf depth at 10 to 12 inches for books and decor — deeper shelves start to feel heavy visually and are harder to reach the back of.
In a bathroom, a small floating shelf at vanity height holds daily-use items and keeps the counter clear. In these spaces, make sure you are using shelves and hardware that can handle humidity. Solid wood needs to be sealed. Open-grain wood absorbs moisture and will warp over time in a bathroom with poor ventilation.
If you enjoy larger outdoor projects alongside indoor DIY work, the skills involved in measuring, leveling, and building with wood carry over directly. Building a raised garden bed uses the same measuring and squaring fundamentals as shelf installation and is similarly satisfying to finish in a weekend.
For wood selection, the Wikipedia article on lumber grades and types is useful if you are building your own shelves from raw boards and want to understand the difference between clear lumber, select grades, and common grades before buying. And if you want to go deeper on the engineering behind wall fasteners and why toggle bolts outperform standard anchors, the Family Handyman guide to wall anchors covers load ratings and installation specifics in detail that is genuinely useful before buying hardware for a heavy shelf.
FAQ
Do floating shelves have to go into studs?
Floating shelves do not have to be installed into studs, but they will need to be secured to the wall using a suitable anchor to ensure they hold without tearing away from the wall. The practical answer is that studs are always the preferred option for any shelf that will hold real weight. For shelves holding only light decorative items, properly installed toggle bolts in drywall can work. For anything holding books, kitchen items, or heavy objects, stud mounting or wall blocking is the right approach. Drywall anchors alone are not adequate for loaded floating shelves.
How much weight can a floating shelf hold?
In most cases, floating shelves can hold objects from 25 to 100 pounds, depending on the length, depth, number of brackets, and anchor system. A shelf mounted into two studs with quality hardware is at the higher end of that range. A shelf using only drywall anchors is at the lower end, and the load limit continues to decrease over time as the anchors work against the drywall. If you are planning to put heavy items on a shelf, calculate the approximate total weight before installing and make sure the mounting method is rated well above that number.
How do I hang a floating shelf by myself without a helper?
The main challenge of solo shelf hanging is holding the shelf level while simultaneously marking the wall. A few tricks make it manageable. For bracket-style shelves, mount one bracket first and temporarily hang the shelf to find where the second bracket needs to go. Use a self-standing laser level if you have one — it projects a perfectly level line across the wall so your hands are free. Alternatively, run a piece of painter’s tape at the correct height as a reference line, then work off that. A ledger board — a straight piece of scrap wood temporarily screwed into the wall at the shelf height — gives you something to rest the shelf on while you work hands-free.
My shelf is level but one end has a small gap from the wall. Is that a problem?
A small gap at the back of the shelf where it meets the wall is usually a cosmetic issue rather than a structural one, caused by the wall not being perfectly flat. If the gap is less than a quarter inch, a thin bead of paintable caulk along the top back edge of the shelf fills it cleanly without affecting the installation. If the gap is larger, the bracket may not be making full contact with the wall, which can affect load distribution. Check that all screws are fully seated and that the bracket itself is not slightly bowed.
How do I find studs in a plaster wall?
Plaster walls are thicker and denser than drywall, and many standard stud finders struggle to reliably detect studs through plaster. A magnetic stud finder that detects the metal nails or screws used to attach the lath to the studs often works better than electronic models in plaster. The finish nail confirmation method also works with plaster — drive a thin nail at a shallow angle until you hit resistance. Plaster is also more prone to cracking when drilled, so use sharp bits, drill slowly at first, and consider scoring the plaster surface with a utility knife before drilling to reduce chip-out around the hole.
Why is my floating shelf sagging in the middle even though the brackets are secure?
Sagging in the middle of the shelf with secure brackets usually means the shelf material itself is deflecting under load rather than the mounting failing. This is common with long shelves made from thin material — a 48-inch shelf made from three-quarter-inch plywood will sag noticeably under a full load of books. Solutions include using thicker shelf material (at least one inch for spans over 36 inches), adding a center bracket, or choosing a denser material like solid hardwood or MDF with a solid core. Particle board and thin MDF are particularly prone to sagging under sustained load and are not good choices for shelves holding heavy items.
Can I paint or stain floating shelves after installation?
You can, but it is much easier to finish the shelf before mounting it. Apply paint or stain to the shelf board first, let it dry completely, then install. Trying to paint a mounted shelf means dealing with drips onto the wall, difficulty reaching the back face, and the risk of getting paint on hardware. If you want to touch up the cut ends after installation, that is straightforward with a small brush. If the entire shelf needs finishing, do it on the ground before it goes up.