
A full kitchen backsplash renovation with real tile costs $600 to $1,300 on average once you factor in materials, grout, thin-set, and labor. A peel-and-stick backsplash covering the same area runs $50 to $200 depending on the tile you choose, takes one afternoon to install, and doesn’t require any tools beyond a level, a utility knife, and a tape measure.
That’s a compelling case, and it’s why so many homeowners go this route for a kitchen refresh — especially renters who want the look without permanent changes, or people saving up for a full remodel who don’t want to stare at bare drywall for two years in the meantime.
This guide covers the full process from measuring and buying the right amount of tile, to prepping the wall properly (which is where most DIY backsplash jobs fail), to applying, cutting, and finishing so it looks like you paid someone to do it. Done right, a peel-and-stick backsplash in a low-to-moderate moisture area can hold up for five years or more without lifting, bubbling, or yellowing.
What Peel-and-Stick Backsplash Tile Actually Is
Before getting into the how, it’s worth knowing what you’re actually buying. “Peel-and-stick backsplash” covers a pretty wide range of products that look similar on the shelf but perform very differently in practice.
The most affordable option is printed vinyl tile. These are thin flexible sheets with a photographic print of stone, subway tile, mosaic, or another pattern laminated over a vinyl backing. They’re water-resistant, easy to cut with scissors, and work fine for lower-traffic areas. The main weakness is that they can look obviously flat and two-dimensional up close, and the adhesive on budget versions starts to lift within a year or two.
Gel or 3D tiles are a step up. They have a textured surface that mimics the look of real tile more convincingly and tend to hold up better over time. They cost more but are worth it if you want something that reads as real tile from across the room.
Natural material mosaics — thin-cut real stone, glass, or shell pieces mounted on a mesh or adhesive backing — are the most convincing option and the most expensive. These behave more like actual tile installation, which makes them better in high-moisture areas but also less forgiving if the wall isn’t perfectly prepared.
For most kitchen backsplash projects, a mid-range gel or 3D vinyl tile hits the right balance between appearance, durability, and ease of installation. Prices range from about $4 to $30 per square foot depending on material and quality. At the low end you get something that will need replacing in two to three years. At the mid to high end you get something that can legitimately stay on your wall for five to ten years if the prep work is done right.
How to Figure Out How Much to Buy
Measure the total wall area you’re covering in square feet — width times height — and add 10 to 15 percent for waste from cuts. Measure twice, because running short halfway through means waiting for a second order that may not match the batch coloring of the first.
For a standard kitchen backsplash running along one wall behind a counter, measure the length of the counter and multiply by the height from the countertop to the bottom of the upper cabinets. That’s usually somewhere between 15 and 30 inches, which gives you roughly 15 to 30 square feet of coverage on a typical 8-foot run.
Also note any outlets, switches, or windows that break up the wall. You’ll need to cut around these, which adds to waste. For a wall with multiple interruptions, add closer to 20 percent extra rather than 10 percent.
Buy everything at once from the same batch. Tile color can vary slightly between production runs, and if you order a second pack two weeks later it may not match the first exactly — which becomes visible on the wall.
What Surfaces Work and What Doesn’t
This matters more than most packaging will tell you. Peel-and-stick tile adhesive needs a smooth, flat, non-porous surface to bond well. When any of those conditions aren’t met, the tiles lift at the corners within months regardless of how carefully you installed them.
Painted drywall is the best surface for this type of tile — flat, smooth, and primed. If your walls are painted, you’re in good shape as long as the paint is firmly adhered and not flaking. Glossy paint can actually improve adhesion compared to flat paint, which is the opposite of what most people expect.
Existing smooth tile is another surface where peel-and-stick works well, as long as the grout lines aren’t raised significantly above the tile surface. Tiles can be installed over existing ceramic, marble, glass, or porcelain tile as long as the grout seams are flush with the tile. If your grout lines sit noticeably higher than the tile face, the peel-and-stick sheet will only contact the raised grout and not bond to the tile surface itself, which leads to bubbling and peeling.
What doesn’t work well: textured walls, rough concrete, unpainted drywall, wallpaper, and surfaces with any oiliness or moisture. Backerboard is not a good surface for peel-and-stick either — the porosity prevents the adhesive from fully bonding.
The area directly behind a stove on the cooking surface side is worth mentioning specifically. Peel-and-stick tiles can be used in heat areas up to 150 degrees Fahrenheit, which covers the countertop and wall around the stove but not the surface directly behind active burners during cooking. If your wall directly behind the burner gets noticeably hot when cooking, that area is better left as-is or covered with a thin stainless steel panel instead.
Tools and Supplies You’ll Need
Nothing on this list is unusual or expensive, and you likely own most of it already.
- Tape measure and pencil
- Level (a 24-inch or 48-inch level works best for keeping rows straight)
- Utility knife and plenty of spare blades — blades dull fast cutting tile and a sharp blade makes cleaner cuts
- Straight edge or metal ruler
- Scissors (for flexible vinyl tile)
- Cutting mat or cardboard to protect the floor when cutting
- Degreaser or TSP substitute cleaner
- Clean rags and paper towels
- Rubbing alcohol for final surface prep
- Painter’s tape
- Caulk and caulk gun for finishing edges
- Plastic smoother or credit card for pressing tiles flat
Optional but useful: a hair dryer for warming tiles before cutting curved shapes, and a small roller for pressing tiles firmly against the wall after application.
How to Install Peel-and-Stick Backsplash Tile Step by Step
Step 1. Remove Everything from the Wall
Turn off the power to the outlets and light switches in the area at the circuit breaker. Remove outlet cover plates and switch plates completely — screwdriver, two screws, 30 seconds each. Set them aside along with the screws.
You’ll be running tile up to and sometimes over the outlet boxes, so having the covers off now means you can tile cleanly and reattach the covers over the tile when you’re done. This is what separates a finished-looking installation from one that looks obviously DIY.
Take down any items hanging on or near the wall. Clear the countertop so you have a clean staging area for tile sheets, tools, and cut pieces.
Step 2. Clean and Degrease the Wall Thoroughly
This is the step that determines how long your backsplash actually stays on the wall. A clean surface is the number one factor in adhesion quality — more important than the brand of tile, more important than technique, more important than anything else on this list.
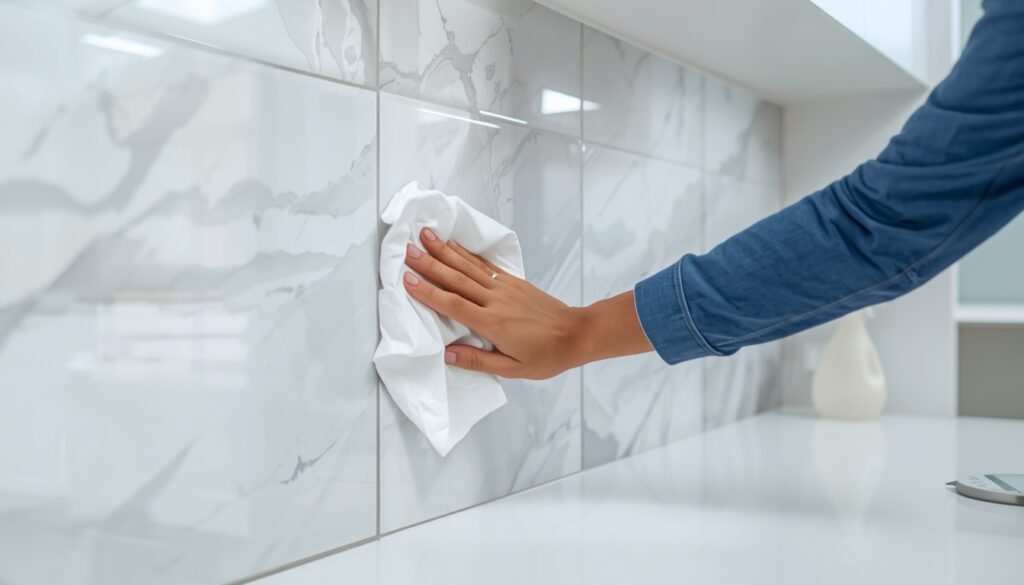
Kitchen walls accumulate cooking grease and oil that you can’t always see but that completely undermines adhesion. Apply a degreaser or TSP substitute cleaner to the entire wall area and scrub with a clean cloth. If you’ve been cooking in the kitchen for years, expect the cloth to come away dirty even on walls that looked clean. Rinse with water and let the wall dry completely.
Once dry, wipe the entire surface with isopropyl alcohol and let it evaporate. This removes any remaining residue and oils that the degreaser didn’t catch. The wall should look and feel completely clean and not at all tacky before you apply a single tile.
Do not caulk over moisture. The same principle applies here: the surface must be fully dry before you start. In a humid kitchen, give it at least 30 to 60 minutes after the final wipe-down before touching a tile. If you rush this step, you’ll notice it three months later when tiles start lifting at the corners.
Step 3. Plan Your Layout Before Touching a Single Tile
Do not start in the corner. This is the most common layout mistake, and it leads to a finished backsplash with tiny slivers of tile at one end and full tiles at the other, which looks unbalanced and amateurish.
Instead, find the center of the wall and work outward in both directions. Mark the center with a pencil. Hold a row of tiles up to the wall without peeling the backing and see how the pattern falls at each end. If you end up with less than half a tile at both corners, shift your center point half a tile to one side so you get roughly equal margins at each end.
Use a level to draw a horizontal reference line across the wall at the height of your first row. This is the most important line you’ll draw — every row above it depends on it being perfectly level. A line that’s even a half-degree off becomes increasingly obvious as you add more rows.
Also plan your tile orientation. Some tiles have a directional pattern or grain, and mixing orientations creates a visible inconsistency in the finished wall. Check whether the tile you bought needs to be installed in a consistent direction before you start.
Step 4. Do a Dry Layout First
Before peeling anything, hold sheets up to the wall in their installed positions and confirm how the pattern looks. Note where cuts need to happen — at corners, around outlets, under cabinet edges. This is the time to adjust your starting point if needed, not after 10 sheets are already stuck to the wall.
For tiles that come in larger sheets, check that adjacent sheets align pattern-to-pattern. Some products are designed so adjacent sheets connect seamlessly when butted together; others have a slight offset that needs to be accounted for. The product instructions will tell you, but a dry layout shows you in person.
Mark with a light pencil where any unusual cuts will be needed — L-shaped cuts around outlets, angled cuts near a window edge, or notched cuts at a corner. Having these mapped out before you start means you won’t be improvising while holding a sticky tile.
Step 5. Start at Your Center Line and Work Outward
Peel just the corner or a small portion of the backing first — not the whole thing. Position the tile against your reference line and make sure it’s aligned before committing the full sheet. A sponge or spray bottle with a thin layer of soapy water applied to the wall can give you a brief window to adjust a flat sheet before the adhesive fully sets. This works particularly well for larger mosaic sheets where placement precision matters more.
Once positioned, peel the backing fully and press the tile firmly to the wall from the center outward, smoothing as you go to eliminate air pockets. Apply steady pressure across the entire sheet, working toward the edges rather than from one side straight across.
Use a plastic smoother, credit card, or the back of a spoon to press the entire surface firmly against the wall, paying attention to edges and corners. Press hard enough that the adhesive makes full contact with the wall surface everywhere, not just where your hand lands.
Work in one direction — either left to right or top to bottom — so you can maintain your pattern alignment consistently.
Step 6. How to Cut Tiles for Edges and Outlets
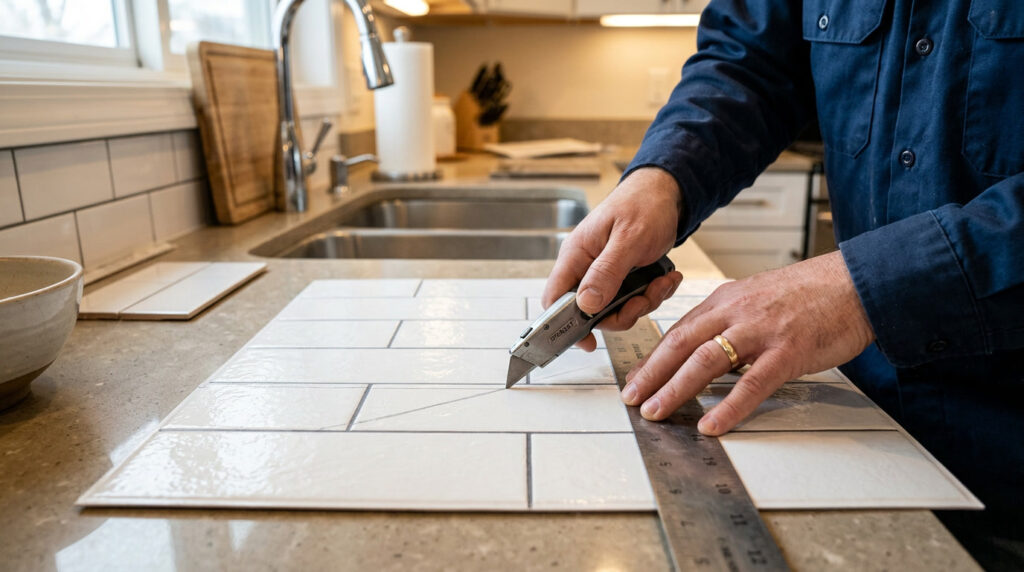
For straight cuts on flexible vinyl tile, a utility knife and a metal ruler or straight edge are your best tools. Score the cut line firmly once or twice, then bend the tile away from the score line and it will snap cleanly. Scissors also work for flexible tile and can be faster for short cuts.
For rigid tiles or glass and stone mosaic sheets, a wet saw with a diamond blade produces the cleanest cuts and is worth renting for a Saturday morning if you have a lot of cuts to make. For small adjustments on rigid sheets, you can score with a utility knife and snap, but the edges won’t be as clean.
For outlet cutouts, the easiest method is to hold the tile sheet up to the wall in its installed position and mark the outlet corners lightly with a pencil through the tile or by measuring from the nearest tile edge. Transfer those measurements to the tile face, mark the rectangle to cut out, and make four straight cuts to create the opening. It doesn’t need to be perfect — the outlet cover plate will overlap the edges and hide any small gaps.
Do not get frustrated in case your cuts are not lining up perfectly when you cut for the first time. Just adjust and trim until it fits. From normal viewing distance, small imperfections in cuts around outlets or at corners are invisible once the cover plates are reinstalled.
Step 7. Finish the Edges and Reinstall Outlet Covers
Once all tiles are in place, run a thin bead of paintable silicone caulk along the bottom edge where the tile meets the countertop and along any open edges at the sides. This prevents moisture from working its way behind the tiles through the bottom seam — which is the most vulnerable point on any backsplash.
Add caulk around the perimeter where the countertop meets the backsplash to prevent any moisture from getting behind the tiles, which can lead to mold or installation failure. Smooth the bead with a damp finger, let it cure for 24 hours before the area gets wet, and wipe away any excess.
Reinstall the outlet covers and switch plates. The cover plate screws may need to be slightly longer than the originals if the tile adds significant thickness — bring an old screw to the hardware store and get ones about a quarter inch longer. Most tile thickness doesn’t require this, but it’s worth checking.
Turn the circuit breaker back on and test every outlet in the area.
Step 8. Wait Before Testing With Water
Give the adhesive at least 24 hours to fully bond before exposing the backsplash to steam or water from cooking. The tile may look and feel perfectly set after a few hours, but the adhesive continues curing underneath and premature heat or moisture can compromise the bond during that window.
This applies especially to the area near the sink where water may splash directly on the tiles. Keep that area dry for the first 24 hours. After that, normal use won’t affect it.
Common Mistakes That Make Peel-and-Stick Fail Early
Not degreasing the wall. The most common reason tiles start lifting within months is that the wall wasn’t cleaned properly before installation. Cooking grease is essentially invisible on a painted wall but completely disrupts adhesion. Clean thoroughly, then clean again with rubbing alcohol.
Peeling the backing in cold conditions. Adhesive performs poorly below about 50 degrees Fahrenheit. Cold adhesive doesn’t flow into surface contact the way it should, which means the bond starts weaker and stays weaker. If your kitchen is cool, bring the tiles inside to a warm room for a few hours before installing and make sure the wall surface is at room temperature.
Skipping the center layout. Starting from one corner almost always produces a lopsided pattern with tiny slivers at one end. It takes five extra minutes to find center and mark your layout, and the difference in the finished result is significant.
Using too much pressure to reposition. Once the adhesive makes contact with a clean wall, it starts bonding immediately. Pulling a tile off to reposition it stretches and damages the adhesive backing and often leaves residue on the wall that makes the second placement weaker than the first. Take your time positioning each tile before making full contact.
Installing over a textured surface without prep. If the wall has any texture — orange peel, sand finish, knockdown — the adhesive only contacts the high points of the texture, not the full surface. This creates a weak bond that starts lifting at the edges first. Sand or prime the wall to fill in the texture, or choose a different installation method.
How to Keep It Looking Good
Peel-and-stick backsplash is easier to maintain than grouted tile because there are no grout lines to trap grease or develop mildew. A weekly wipe-down with a damp cloth and mild dish soap keeps the surface clean without damaging the adhesive.
Avoid harsh chemical cleaners — anything with bleach or abrasive particles can damage the tile surface finish and, in the case of vinyl tiles, can discolor the printed pattern. Wiping up cooking splatter while it’s still warm is much easier than trying to scrub off dried-on grease later.
If a single tile lifts at a corner, warm it with a hair dryer for 30 seconds to soften the adhesive, press it back firmly, and hold for 60 seconds. If the adhesive has lost too much stick, a small amount of construction adhesive or extra-strength double-sided tape behind the corner will reattach it cleanly.
If you eventually want to remove the entire backsplash, warm each tile with a hair dryer before peeling to soften the adhesive. Work slowly from one corner, and the tiles will typically come off in large pieces without taking paint with them. Any residue left on the wall wipes off with a cloth dampened with rubbing alcohol.
Is Peel-and-Stick Backsplash Worth It
For the right situation, absolutely. If you’re renting and want to upgrade without losing your security deposit, if you’re doing budget-friendly kitchen updates while saving for a full remodel, or if you want to refresh a space quickly without the hassle of a full tile installation — peel-and-stick backsplash is a legitimate option that looks far better than bare wall.
It’s worth being realistic about the limitations though. The adhesive bond on even the best peel-and-stick products is not as permanent as thin-set mortar, and in high-moisture or high-heat zones it requires more care and realistic expectations. If your kitchen sees heavy daily cooking with a lot of steam and grease, real tile will outlast peel-and-stick regardless of how well you prep and install it.
Peel-and-stick backsplash also works best when it’s part of a broader attitude toward practical home improvement — making thoughtful upgrades that fit your timeline and budget rather than waiting for the perfect full renovation. That same thinking applies to outdoor projects too. Something like building a raised garden bed from scratch over a weekend follows the exact same philosophy: doable in a short time, surprisingly satisfying, and far less expensive than hiring it out.
For design guidance on color and pattern combinations, the Architectural Digest guide to kitchen backsplash styles covers current trends in a way that’s actually useful for deciding between subway, herringbone, or geometric patterns before you buy. And if you want to understand what makes adhesives bond well to different surfaces — which directly explains why prep work matters so much for this project — the Wikipedia article on pressure-sensitive adhesive covers the material science in plain language.
FAQ
How long does peel-and-stick backsplash actually last?
With proper surface prep and in a low-to-moderate moisture area, quality mid-range tile can hold up for five to ten years or more. Budget vinyl tiles in high-use areas start lifting at the corners within one to two years. The preparation matters more than the price of the tile — a $15-per-square-foot tile on a poorly prepped wall will fail sooner than a $6-per-square-foot tile on a properly degreased and primed surface.
Can I install peel-and-stick tile over existing tile?
Yes, as long as the existing tile surface is smooth and clean, and the grout lines are not raised significantly above the tile surface. If the grout sits flush with the tile face, the peel-and-stick adhesive gets full-surface contact and bonds well. If the grout is raised, you’ll get a bumpy surface and the tiles will only adhere to the grout ridges, which causes bubbling and peeling.
Can I put peel-and-stick backsplash behind my stove?
Not directly behind active burners where the wall surface gets very hot. Most products are rated for surfaces up to 150 degrees Fahrenheit, which covers the walls around the stove but not the zone that directly contacts high heat during cooking. For the immediate area behind the burners on a gas or high-output electric range, a stainless steel backsplash panel or real tile is the safer choice.
My tiles are lifting at the edges after a few weeks. What went wrong?
The most likely cause is residual grease or moisture on the wall at the time of installation. Even surfaces that look clean often have an invisible oil film from cooking. The second most common cause is cold adhesive — if the tiles were installed in a cool space, the adhesive never flowed properly into full contact with the wall. If you catch it early, peel back the tile, clean the wall with rubbing alcohol, let it dry fully, and reinstall. If the adhesive on the tile backing is damaged from removal, a strip of double-sided mounting tape on the back of the lifted edge will reattach it cleanly.
Do peel-and-stick tiles need grout?
Most don’t. The sheets are designed so tiles sit edge-to-edge with the pattern simulating grout lines built into the design. Some higher-end natural stone mosaic products do use real grout between the individual pieces, but for standard vinyl or gel peel-and-stick sheets, there’s nothing to grout.
What’s the best way to cut around an electrical outlet?
Measure the exact position of the outlet box relative to the nearest tile edge in two directions — horizontal and vertical. Transfer those measurements to the tile sheet face, mark the rectangle, and make four straight cuts with a utility knife. The opening doesn’t need to be perfectly smooth at the edges since the cover plate will overlap it by at least half an inch on all sides. Test-fit the cutout piece before peeling the backing to confirm the measurements before committing.
Can I remove peel-and-stick backsplash without damaging the wall?
Usually yes, especially with vinyl products applied to painted drywall. The key is using heat to soften the adhesive during removal. A hair dryer on medium heat held a few inches from the tile surface for 20 to 30 seconds per tile makes removal significantly easier and reduces the chance of pulling paint off the wall. Work slowly from a corner and the tile will typically peel away in large pieces. Any adhesive residue left behind cleans up with rubbing alcohol on a cloth.
How do I match new tiles to an existing section if I need to add more?
Buy from the same retailer and ideally the same product line, but understand that tile coloring can vary between production batches. Before installing new tiles next to existing ones, hold a new tile up to the edge of the installed section and compare in natural light. If there’s a visible color difference, consider using the new tiles in a less visible area and moving some of the original tiles to the prominent section.