
Discovering water on the floor around your water heater is one of those moments that feels more urgent than it probably is — but also one that genuinely cannot wait a few days to sort out. A minor drip from a loose fitting is a quick fix. A tank that has corroded through can dump 40 to 80 gallons of water onto your floor in minutes if it fails completely. The difference between those two situations is where the water is coming from.
This guide walks you through exactly what to do in the first 15 minutes after discovering a leak, how to figure out the source, which problems are fixable yourself, and which ones mean it is time for a new unit. No guesswork, no panic — just the right steps in the right order.
Important: If you smell gas near the water heater at any point, leave the house immediately. Do not flip any switches. Call your gas company from outside or from a neighbor’s phone.
The First Two Steps — Do These Before Anything Else
These two steps apply no matter what kind of leak you have or where it is coming from. Do them first, before you try to diagnose anything.
Step 1. Cut the Power to the Water Heater
For an electric water heater, go to your breaker panel and switch off the dedicated breaker — it is usually labeled “Water Heater.” For a gas unit, find the gas control valve on the front of the unit and turn the knob to the OFF or PILOT position. Do not try to relight it until the leak is resolved. Water near electrical components and energized heating elements is a serious shock hazard. Turn it off before you touch anything.
Step 2. Shut Off the Cold Water Supply
The cold water inlet valve sits on top of the unit — there are usually two pipes at the top, one marked for cold. Turn it clockwise until it stops. This cuts off the water supply so no more water enters the tank while you figure out what is happening. If the valve is stuck and will not move, shut off your home’s main water supply instead. As a bonus step, open a hot water faucet somewhere in the house to relieve pressure in the system, which can slow an active leak.
Pro tip: Dry the floor around the base of the unit with a towel, then wait 15 to 20 minutes and watch where new moisture appears. Water travels downward, so the puddle on the floor tells you the leak’s exit point but not always its source. Watching where fresh moisture shows up tells you far more.
Is That Actually a Leak? Rule Out Condensation First
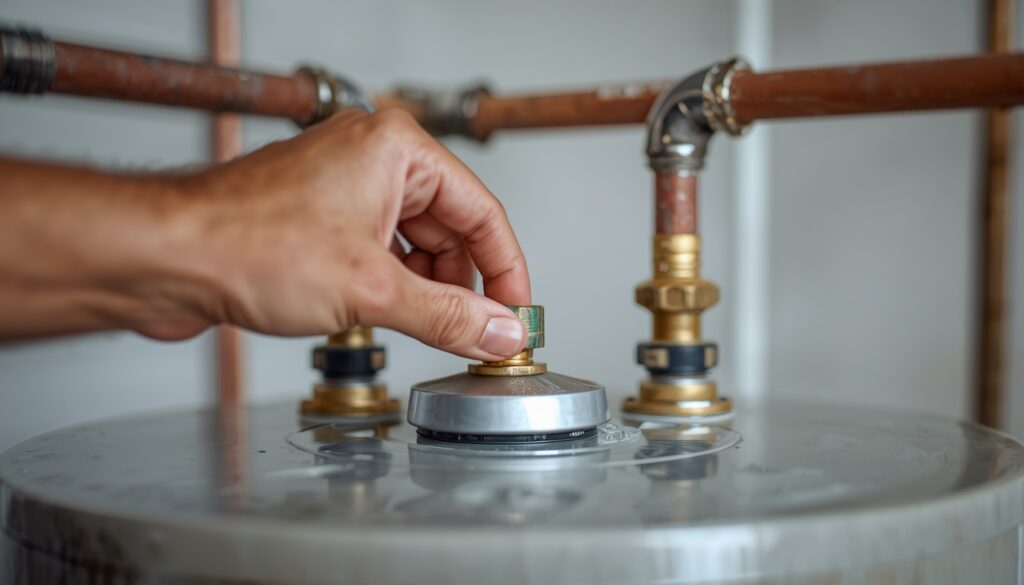
Before assuming the worst, rule out something that mimics a water heater leak surprisingly well: condensation. When a large volume of cold water enters a tank quickly — like after heavy hot-water use — the temperature difference can cause moisture to form on the outside of the tank and drip to the floor. This is especially common in basements, utility closets, and garages where humidity is higher.
Condensation typically shows up as a uniform dampness on the lower part of the tank exterior and usually stops once the tank finishes a full heating cycle. Dry the outside of the tank completely and wait an hour. If the moisture does not return, condensation is likely the cause and no repair is needed — just improve ventilation in the space.
If the moisture returns even when the tank has not been running recently, you are looking at a real leak and need to find the source. Also double-check whether there is another appliance sharing the same mechanical room — a furnace, AC drain line, water softener, or washing machine. Water from another source can pool near the water heater and create a very convincing false alarm.
Where Is the Leak Coming From? A Location-by-Location Breakdown
The location of the water tells you almost everything you need to know. Work through each of these systematically, starting at the top of the unit and working down. Use a flashlight and dry paper towels — press a dry towel against each connection point to identify moisture you cannot see.
Leak at the Top of the Unit
Water appearing at the top of the tank has two primary sources. First, check the cold water inlet and hot water outlet connections — the two pipe fittings where supply lines connect to the tank. These are under constant pressure and can loosen over years of thermal expansion and contraction. If a fitting feels even slightly damp when you press a dry cloth against it, try tightening it one quarter turn with a pipe wrench. Do not overtighten — these fittings are often threaded into a brass port and over-torquing cracks them.
Also look at the flex supply lines themselves. If you see bulging, kinking, corrosion, or the outer braiding looks frayed, the flex connector needs to be replaced before it fails completely. Burst flex connectors are responsible for a significant number of home flooding events and they give very little warning before failing.
Second, check whether there is an expansion tank mounted above or beside the unit. Homes with a closed plumbing system are required to have one, and a failed expansion tank bladder or loose fitting on it can drip onto the main unit and look exactly like a water heater leak from the top.
Leak from the T&P Relief Valve or Its Discharge Pipe
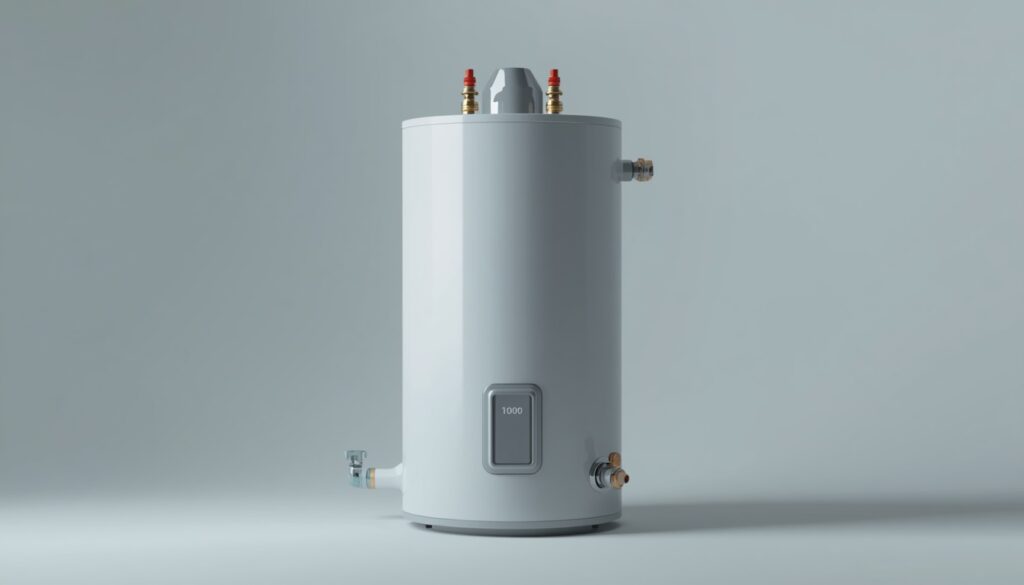
The temperature and pressure relief valve — usually called the T&P valve — is a safety device mounted on the side or top of the tank. Its discharge pipe runs down the side of the unit and terminates near the floor or into a drain pan. The T&P valve is designed to open automatically if the temperature or pressure inside the tank exceeds safe operating limits, releasing water to prevent an explosion.
If water is dripping steadily from the end of the discharge pipe when the tank is not in a heating cycle, one of two things is happening. Either the T&P valve itself has worn out and is weeping in its normal closed position — which means it needs to be replaced — or the pressure or temperature inside the tank has actually gotten high enough to trigger it, which is a more serious problem.
Do not ignore this: A T&P valve that activates repeatedly is a safety warning, not just a maintenance issue. If yours is discharging regularly, do not simply replace the valve without also having a plumber check the system pressure and temperature settings. The valve is doing its job — the real question is why it needs to.
Replacing a T&P valve is a relatively inexpensive repair — the valve itself costs $15 to $40 — but it does involve draining part of the tank and working on pressurized connections. Most homeowners handle it themselves with basic tools, but if you are not comfortable, it is a quick and affordable job for a plumber.
Leak at the Bottom — The Drain Valve
The drain valve is the spigot at the very base of the tank. It is used for flushing sediment during maintenance and for draining the tank when you need to replace it. Most residential drain valves are plastic, and they commonly begin to fail between 8 and 10 years into the unit’s life.
If you see water dripping from the valve itself or from the area where it threads into the tank, start by trying to tighten it a quarter turn with a wrench. Stop immediately if you feel significant resistance — overtightening a plastic drain valve body cracks it, which turns a drip into a steady stream. If gentle tightening does not stop the leak, the valve needs to be replaced. Replacement drain valves are inexpensive and widely available at hardware stores, and swapping one out is a task most homeowners can do with a wrench, a short length of garden hose, and a bucket.
Leak at the Bottom — The Tank Itself
If you have checked the drain valve, T&P discharge pipe, and all the connections at the top and you still cannot identify the leak source — and water keeps appearing at the base — the tank itself may have corroded through internally. This is the diagnosis nobody wants because it means replacement, not repair.
Internal tank corrosion happens when the glass liner that protects the steel tank develops cracks over time. Once water reaches the steel tank body, rust forms and eventually works through the metal. The first sign is usually rust-colored water from hot water taps, followed eventually by external seeping at the seams or base of the tank.
There is no repair for a corroded tank. Any sealant or patch applied to the outside surface of a leaking tank is a temporary measure at best and can mask a failure that is getting progressively worse. If the tank is leaking from its body, you need a new water heater.
What You Can Fix Yourself vs. What Needs a Plumber
| Issue | DIY or Pro? | Typical Cost |
|---|---|---|
| Loose pipe connection at top | DIY — quarter-turn tighten | $0 |
| Failed flex supply line | DIY — part is $10–$20 | $10–$20 |
| Dripping drain valve | DIY — replacement valve $8–$15 | $8–$15 |
| T&P valve replacement | DIY possible, plumber safer | $15–$40 + labor |
| High system pressure causing T&P to trip | Plumber required | $150–$400 |
| Corroded tank — internal failure | Replacement — plumber required | $900–$1,800 installed |
| Anode rod seal failure | DIY possible with tools | $20–$50 in parts |
If You Need to Drain the Tank
If the leak is active and significant, draining the tank reduces the amount of water that can escape while you wait for parts or a plumber. Connect a standard garden hose to the drain valve at the base of the tank. Run the other end to a floor drain, outside, or into a large bucket — remember this water may be very hot. Open the drain valve by turning it counterclockwise. To help the water flow out, open a hot water faucet somewhere in the house to let air into the system. The tank will drain slowly at first and pick up speed as air enters. A 50-gallon tank takes 20 to 45 minutes to fully drain.
Hot water heaters can hold water at 120 to 140 degrees Fahrenheit — hot enough to cause serious burns. Be cautious, keep children away from the area, and do not let the hose kink and build pressure.
How Old Is Your Water Heater? When Repair Makes No Sense
Before spending money on repairs, check how old the unit is. Most tank-style water heaters are designed to last 8 to 12 years. You can find the manufacture date on the rating plate — it is usually encoded in the serial number. The first four digits often indicate the week and year (for example, 1215 means the 12th week of 2015), but this varies by manufacturer. Look up the brand’s serial number format if the date is not obvious.
A general rule worth following: if the unit is less than 7 years old and the leak is from a component rather than the tank itself, repair it. If it is 10 years old or older and you are dealing with anything beyond a minor fitting leak, start pricing replacements. Spending $250 in labor to fix a drain valve on a 12-year-old tank that is also showing signs of sediment buildup and rust-colored water is not a good use of money.
The EPA WaterSense water heater guidance is worth reading before replacing a unit — modern high-efficiency water heaters use significantly less energy than older models, and the long-term savings on utility bills can offset the higher upfront cost of an Energy Star-rated unit within a few years.
What Causes Water Heaters to Fail Early
Understanding the common causes of premature failure helps you extend the life of a replacement unit and avoid ending up in the same situation in eight years.
Sediment Buildup
Minerals in your water supply — primarily calcium and magnesium in hard water areas — settle at the bottom of the tank over time. This sediment layer insulates the heating element from the water above it, causing the tank floor to overheat. Sustained overheating weakens the glass liner and eventually the steel tank itself. Flushing the tank once a year removes the sediment before it reaches damaging levels. For a full understanding of how water heaters work and why maintenance matters, the Wikipedia overview of water heating systems is a solid starting point.
A Neglected Anode Rod
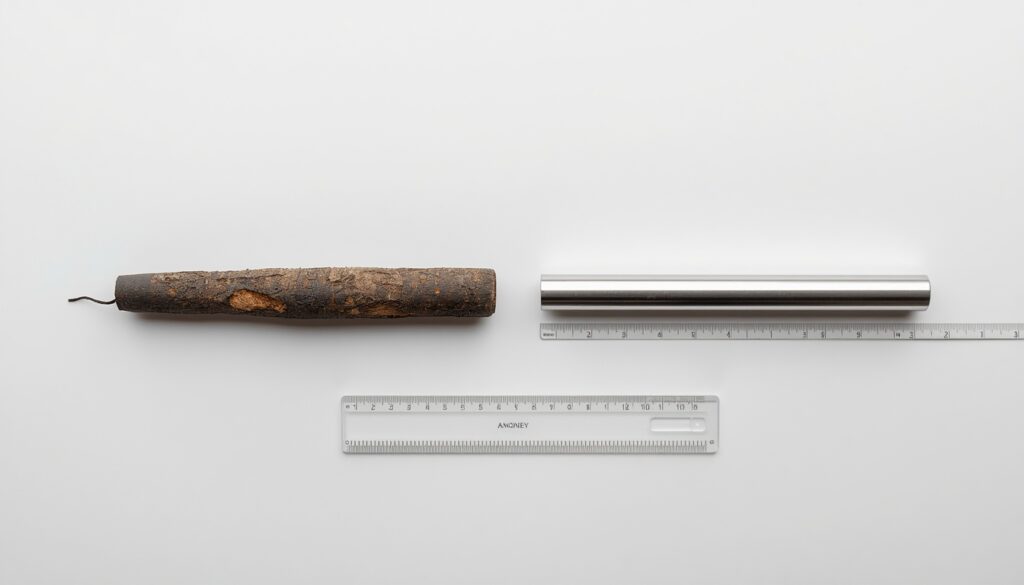
The anode rod is a sacrificial metal rod suspended inside the tank — usually magnesium or aluminum — that corrodes preferentially so the steel tank does not have to. When the anode rod is fully consumed, the tank itself becomes the sacrificial element and starts to corrode from the inside out. Most anode rods need replacing every 3 to 5 years, but the majority of homeowners never touch them because they are invisible and out of sight. Checking and replacing the anode rod on schedule is the single most impactful maintenance step for extending the lifespan of a tank water heater.
High Water Pressure
Residential water pressure above 80 psi stresses every component in a water heater — connections, valves, the tank walls, and the T&P valve. High pressure causes fittings to loosen faster and gives the T&P valve more reason to trip. If you have had recurring fitting leaks or T&P activation on a relatively newer unit, check your home’s water pressure with an inexpensive pressure gauge screwed onto a hose bib. If it reads consistently above 80 psi, a pressure-reducing valve installed on the main supply line will protect not just the water heater but every plumbing fixture and appliance in the house.
Protecting Your Home While You Wait for a Repair
If you have shut off the power and cold water supply but cannot get a plumber out until tomorrow, a few extra steps can prevent a manageable leak from turning into a serious water damage situation.
Place old towels or a large plastic tote under the tank to catch any continuing drip. Move anything stored near the water heater — especially cardboard boxes, seasonal items, or anything that would be damaged by water — away from the unit. If the leak is active enough that you are concerned about the floor or the room below, open a hot water faucet to reduce remaining pressure in the tank and speed the draining process.
Take photos of the leak before cleaning up. If the leak has already caused visible water damage to flooring or drywall, you will want documentation for a potential homeowner’s insurance claim. Most policies cover sudden and accidental water damage from appliances; gradual leaks that were not addressed are typically not covered.
While you are dealing with water issues in the house, it is a good time to check whether any other plumbing problems have been sitting on the back burner. A running toilet that you have been ignoring can waste hundreds of gallons per week, and a clogged drain that has been building up for months tends to fully block at the least convenient time. Small plumbing issues compound, and getting them resolved while you already have a plumber’s attention saves you a second service call.When to Replace vs. Repair: A Quick Summary
Repair if: The unit is less than 8 years old. The leak is from a fitting, drain valve, flex connector, or T&P valve. The tank body shows no signs of corrosion or rust-colored water. The repair cost is less than 40% of the cost of a new unit installed.
Replace if: The unit is 10 years old or more. Water is leaking from the tank body itself — not from a component attached to it. You are seeing rust-colored water from hot water taps. The repair estimate is more than half the cost of a new unit. You have already had one or two significant repairs in the past few years.
FAQ
My hot water heater is leaking from the bottom. Is it definitely done?
Not necessarily. A leak at the bottom of the unit most often comes from the drain valve, which is a relatively simple and inexpensive fix. Try tightening the valve a quarter turn with a wrench first. If it continues to drip, the valve seal has worn out and the valve needs to be replaced — a part that costs $8 to $15 at any hardware store. The situation where a bottom leak means the unit is finished is when water is coming from the tank body itself, not from a component attached to it. That indicates internal corrosion that no repair will address.
Can I still use hot water while the water heater is leaking?
Not if you have shut off power to the unit — which you should have done as a first step. Using hot water while the heater is energized but leaking creates shock and burn risks. For a very minor drip from a fitting, some homeowners choose to use hot water carefully while waiting for a repair appointment, but this carries real risk. If the leak is anything more than a slow drip, leave the system off until the source is identified and repaired.
Water is coming out of the pipe on the side of my water heater. What is that?
That is the discharge pipe connected to the T&P (temperature and pressure) relief valve. Occasional activation of this valve is normal — it is doing its job of releasing excess pressure. Continuous or frequent dripping from the discharge pipe is not normal and means either the T&P valve itself has worn out and needs replacing, or the pressure or temperature inside the tank is consistently running higher than it should. Do not ignore it. Have a plumber check system pressure and the valve together rather than just swapping the valve without understanding why it is opening.
How much does it cost to repair a leaking water heater?
It depends entirely on the source of the leak. Tightening a loose fitting costs nothing. Replacing a drain valve runs $8 to $15 in parts and can be done yourself. A T&P valve replacement is $15 to $40 in parts plus one to two hours of labor if you hire a plumber. Flex connector replacement is $10 to $20 per line plus labor. For repairs that require professional work, expect $150 to $400 depending on the issue and your area. Full tank replacement typically runs $900 to $1,800 installed, depending on unit size, fuel type, and location in the home.
How long can I wait before getting a leaking water heater repaired?
A slow drip from a fitting or drain valve gives you a day or two to schedule a repair without major risk, provided you have shut off the power and cold water supply. An active flow — anything more than a slow drip — needs same-day attention. A corroded tank that is weeping from the body can escalate from a slow seep to a tank failure with very little warning, so do not leave a confirmed tank-body leak unattended.
What is the white pipe on the side of my water heater?
That is the discharge pipe for the temperature and pressure relief valve. It runs from the T&P valve (usually mounted on the upper side of the tank) down to near floor level or into a drain. It should not have standing water in it or be dripping continuously when the heater is in normal operation. If it is dripping, see the T&P valve section above.
Does homeowner’s insurance cover a leaking water heater?
It depends on how the damage is characterized. Most standard homeowner’s policies cover sudden and accidental water damage from a failing appliance. Gradual leaks that went unaddressed over a long period are typically excluded on the grounds that the homeowner should have noticed and acted on it. The appliance itself is usually not covered — policies cover the resulting water damage to flooring, walls, and personal property, not the cost of the replacement unit. Document the leak and damage with photos before cleaning up, and call your insurance company to report it promptly.
My water heater is only 4 years old. Why is it already leaking?
A relatively new unit leaking most often points to a loose connection from installation, high water pressure stressing the fittings, or a drain valve that was never fully tightened from the factory — all of which are fixable. Water quality also plays a role. In areas with very hard water or highly aggressive water, internal corrosion and component wear happen faster than average. If you are on a private well, have your water tested — water chemistry significantly affects how long water heater components last. Check your home’s water pressure too; anything consistently above 80 psi will shorten the life of water heater connections and valves regardless of the unit’s age.